Would you like to learn how to use a SERP snippet tool to boost your clickthrough rates?
A SERP snippet tool can help you make changes that deliver more traffic to your site. And it only takes a few minutes.
In this tutorial, you’ll learn the easy way to use a SERP snippet tool to optimize your web pages for search engine results.
What you’ll need: The All in One SEO (AIOSEO) Plugin.
In This Article
What’s a SERP Snippet Tool?
A SERP snippet tool provides a preview of what a web page may look like in search results. (SERP stands for “search engine results page.”)
The preview includes the title, the URL, and a short description.

You can use a SERP snippet tool to optimize these items so you can get higher click-through rates (CTRs).
Here’s an easy way to do this.
Step 1: Download and Install the All in One SEO (AIOSEO) Plugin
First, we recommend that you download the AIOSEO plugin. This plugin includes a SERP snippet tool that gives you a preview of your page right in the WordPress editor.
AIOSEO has thousands of 5-star reviews on WordPress.org and over 3 million people are using it.
It makes basic SEO tasks as simple as clicking a button or filling out a form field.

After downloading AIOSEO, log in to your WordPress editor.
Go to Plugins » Add New to install and activate AIOSEO.
Questions? Follow the instructions here.
Step 2: Preview Your Web Page as a Google Search Snippet
Now, in your WordPress editor, navigate to any post that you want a preview of.
You can access your Google search snippet in 2 ways:
- In WordPress’s Preview mode
- In WordPress’s Editing mode
In our tutorial example, we’ll be using a made-up post called “How to Create a Digital Strategy Today (Free Downloadable Template).”
Option 1: Start in WordPress Preview mode
Click the preview button in WordPress to enter preview mode.

Hover your cursor over the AIOSEO icon in the admin bar.
You’ll see the SEO Preview option in the drop-down menu. Click it.

Now you can see your search snippet preview:
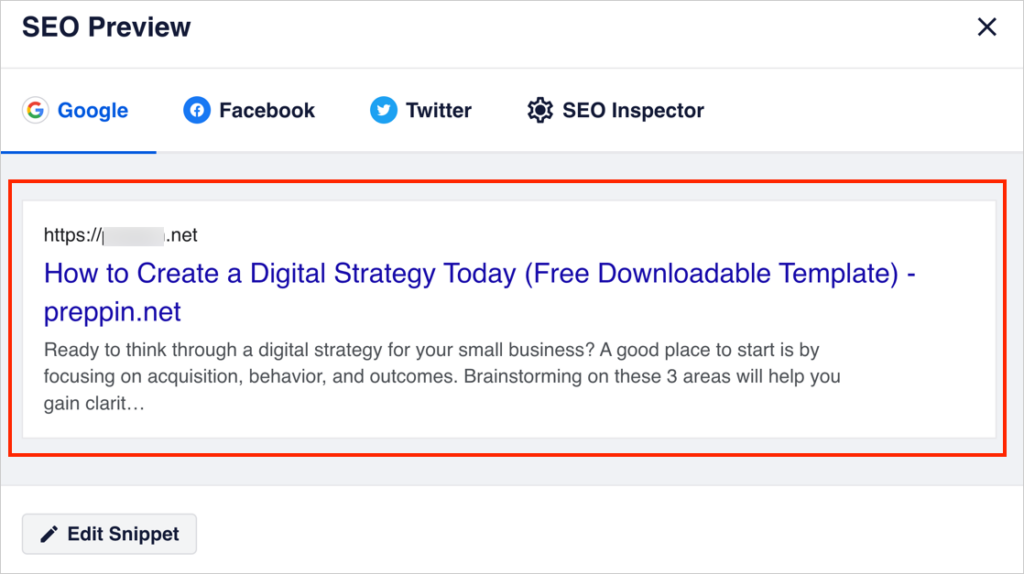
Clicking the Edit Snippet button will allow you to change the title and meta-description. (This is covered in Step 3 below.)
Option 2: Start in WordPress Editing mode
In the WordPress editor, open a post.
At the upper far right,
- Click on the AIOSEO button
- Then click General.
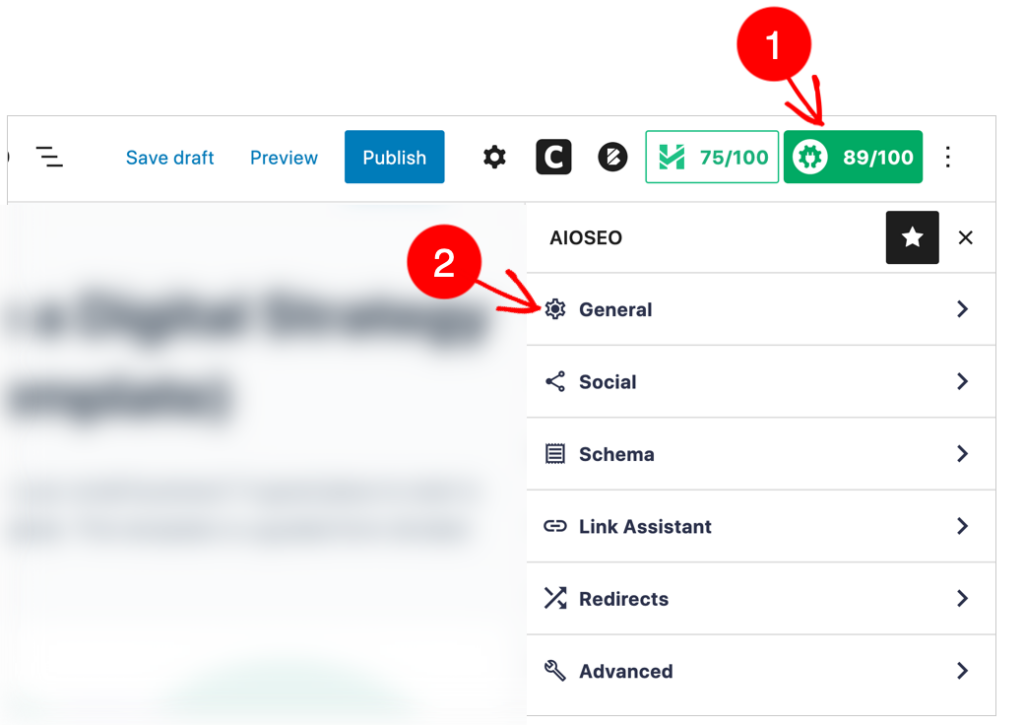
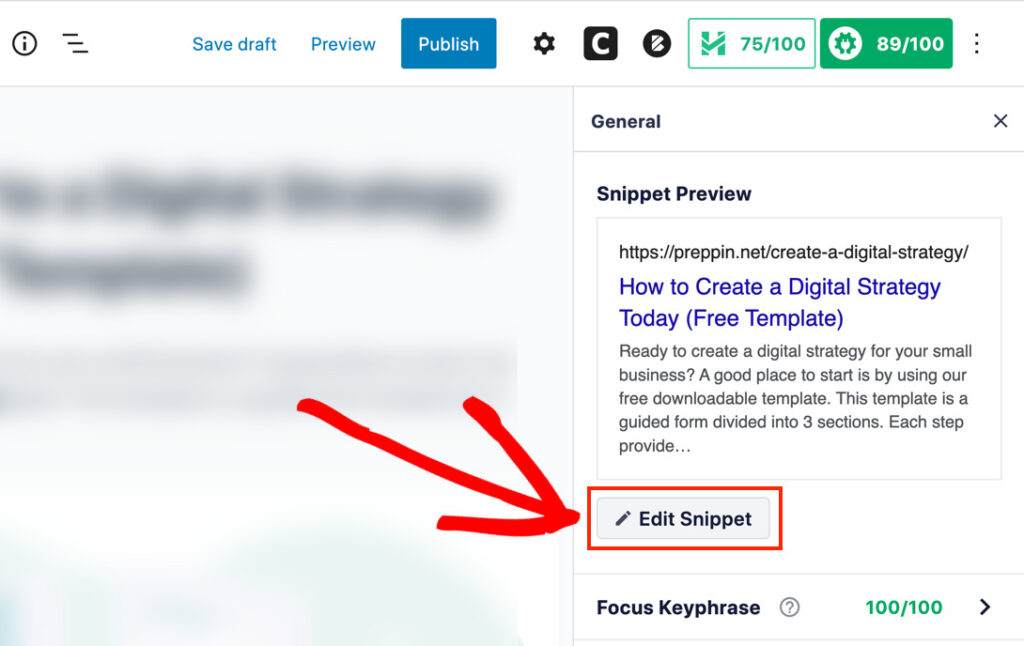
Now you can see a preview of what your article may look like in Google’s search results.
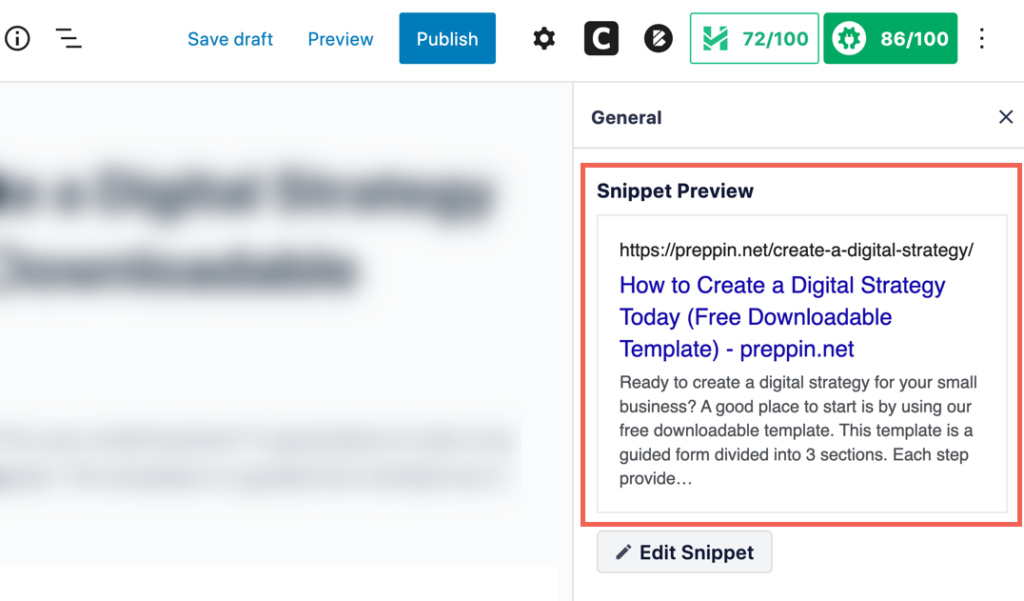
Optional: Toggle Between Desktop and Mobile Views
Click the Edit Snippet button to see a wide-format preview (similar to what a desktop user would see).
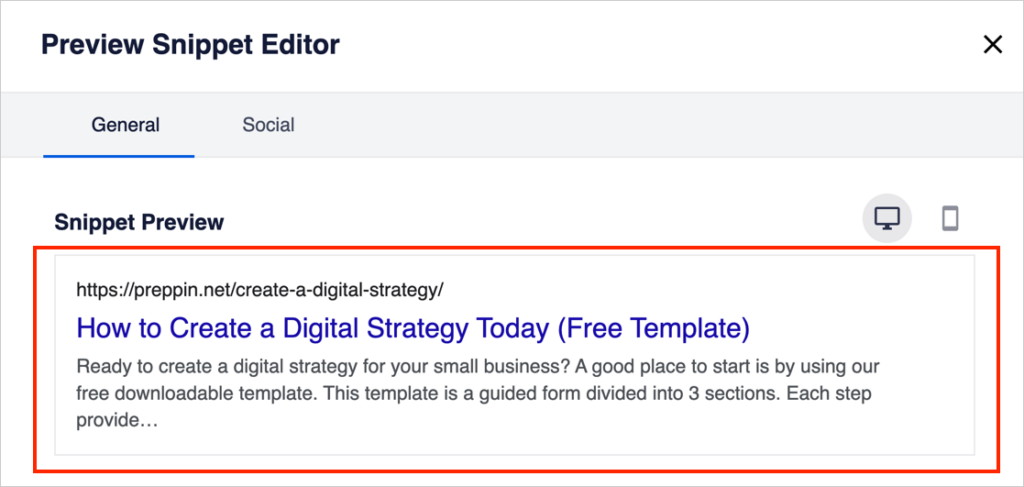
Now you’ll see a pop-up window that displays your SERP snippet in a wide format.
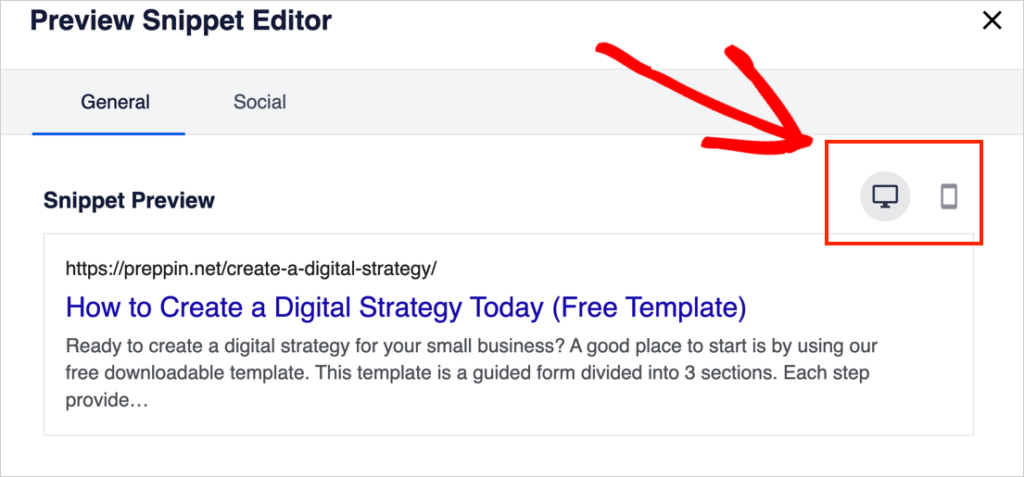
You can toggle between desktop and mobile views by clicking the device icons at upper right.
Keep this preview window open; we’ll be using it for the rest of the tutorial.
Step 3: Set Your Post Title (Title Tag)
Now, let’s find out how to edit a post title for SEO.
- If you’re viewing your post in preview mode, click Edit Snippet.
- If you’re in editing mode, look underneath the Snippet Preview section: there’s a Post Title section.
This Post Title section is where we’ll adjust our headline.

By default, AIOSEO populates the Post Title field with these 3 tags:
- Post Title (this is the title of your article)
- Separator (in this case, a dash)
- Site Title (the name of your website).
These 3 items cause your title to be displayed this way in the search preview:

Check the Length of your Post Title
SEO professionals often recommend keeping your article title under 60 or so characters.
This is because longer titles may get cut off in search results. Here’s an example of that.

(Notice that Google places ellipses where words were cut off.)
The AIOSEO preview recommends 60 characters max.
In our tutorial example, we’re over the “max recommended characters.”
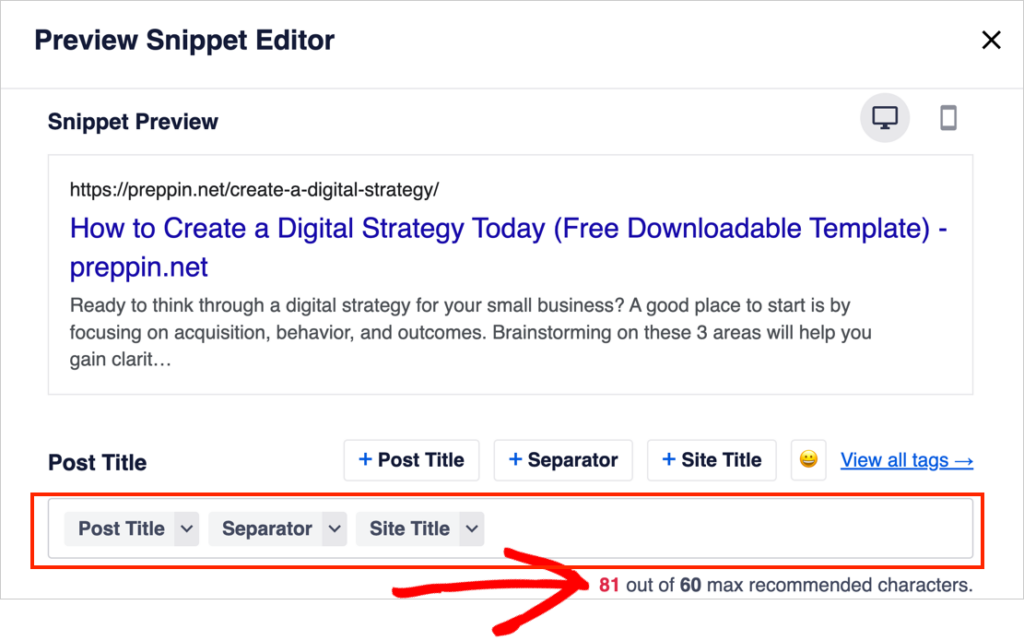
Let’s imagine that we don’t care about our site title or a separator displaying next to our article title in search results. (We actually don’t use these on our own site.)
So we’ll delete the Site Title and Separator tags.
Now the title is 67 characters long. We’re still over the recommended length.
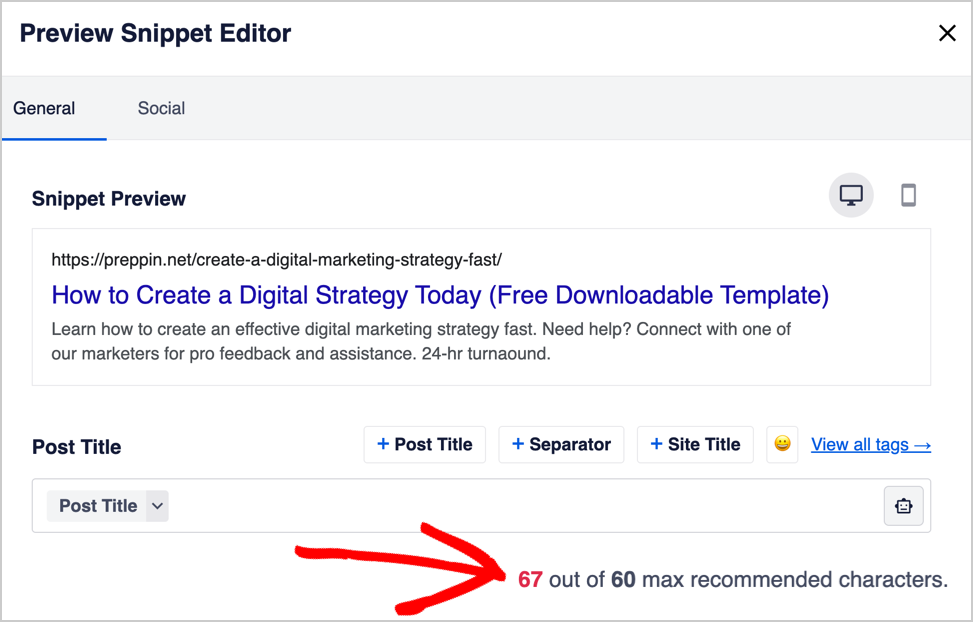
So let’s delete the word “Downloadable” from the title. (You’ll need to scroll to the top of your post to delete words.)
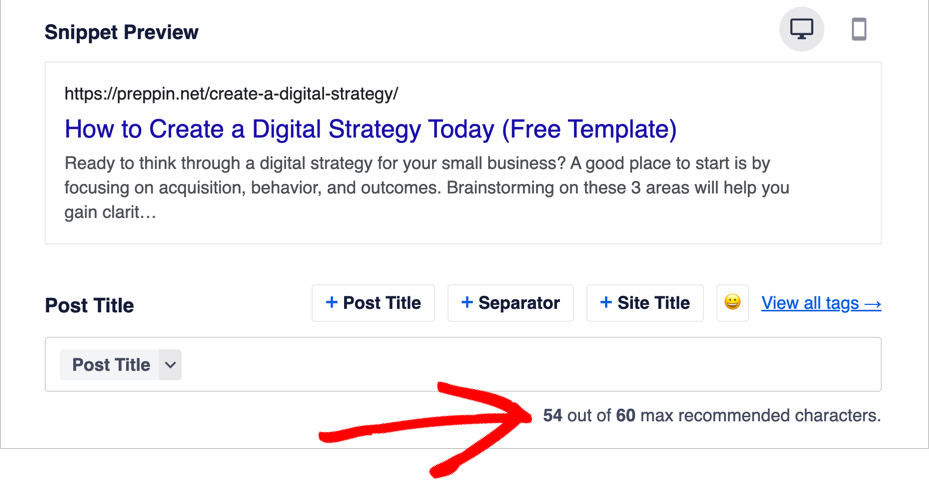
Now our title is well within the recommended character limit.
Additional Tips
You Can Manually Type in Your Title
If you like, you can remove all the tags in the Post Title field, and manually type in the title you want to display in search results (The title you type in can differ from the title you placed at the top of your post.)
You can also remove your manually typed title and put the tags back in by clicking on the buttons located above the Post Title field.
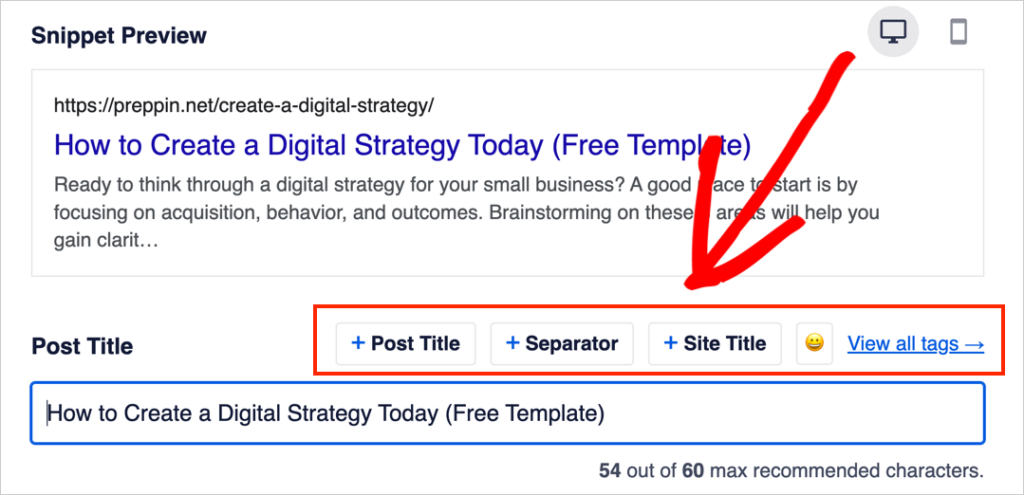
You’ll also notice that there’s an option to add emojis to your title. (Yes, these can show up in search results.)
Depending on your brand voice, these may (or may not) be a good fit for you.
In the example below, we’ve added 2 rocket emojis to our headline to make it stand out in search results.
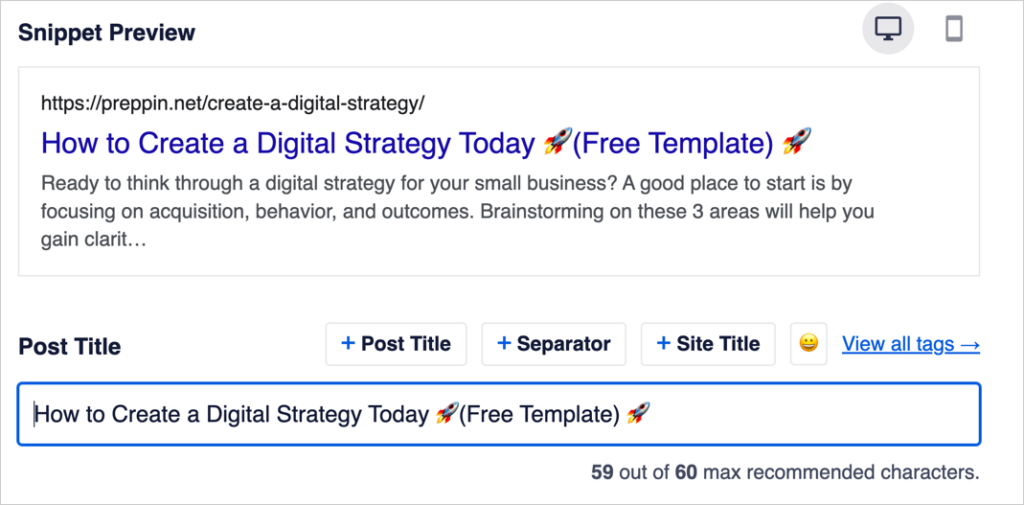
You can learn more about adding emojis to your title and description fields here.
Why You Might Want a Long Title
Professional marketers often go over the “recommended character” limit. Here’s why.
As long as the words that appear within the 60-character limit form a clear and enticing title, you can include some additional keywords and information after that limit.
Here’s an example from a recent blog post of ours:

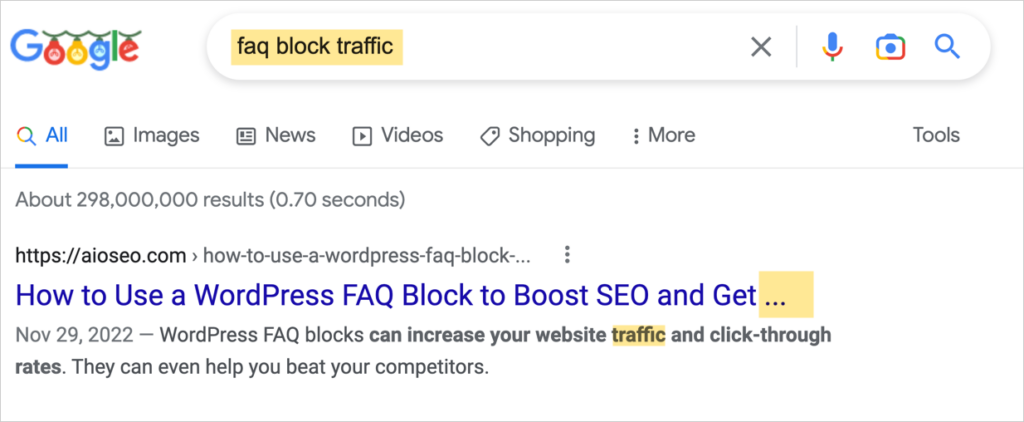
The full title is: How to Use a WordPress FAQ Block to Boost SEO and Get More Traffic.
We added a keyword at the end (“Traffic”) which tells Google something about the content.
As a result, if someone searches for “faq block traffic” our result may appear:
Lastly, if your article lands a featured snippet spot, there’s more room for the title. In the example below, the full title displays at the top.
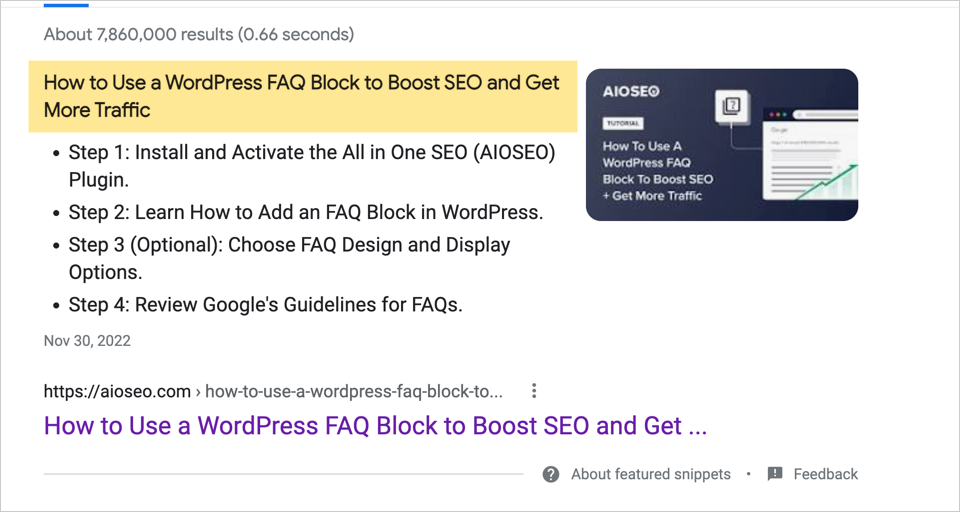
The takeaway: “Recommended” is a guideline that helps you understand what words may get cut off in your title. Once you know this, you can decide whether you want to create a longer title. Google has confirmed there can be SEO value in doing so and they’ve said you shouldn’t focus too much on the length. But avoid excessively long titles filled with “keyword stuffing.” That can get your site penalized.
Meta Title Tag vs. SEO Title: What’s the Difference?
When you read articles about optimizing your title, you’ll often see these related words used:
- Meta title tag
- SEO Title
The title that you set to be displayed in search results will be wrapped with an HTML tag called a title tag.
<title>Here’s My Article Title</title>As we discussed, you can set a different title for search engines than the one on your page. The one you choose for search engines is sometimes called the SEO title.
Google (or other search engines) do not guarantee that they will display your preferred title. Write a clear, descriptive title to increase the chances that yours will display. Google may display a different title if it matches a particular search query better.
Step 4: Optimize Your Meta Description
Just like your title, your article description (called a “meta description”) has a recommended maximum length: 160 characters.
In All in One SEO, the Meta Description field is directly below the Post Title field.
You’ll want to manually type in a meta description that describes your article in clear terms.
So the first thing we’ll do is remove the default Excerpt tag.

This Excerpt tag tells Google to pull any excerpt from your page. Often, when there’s no meta description specified, Google will pull some text from the beginning of your article. And it will usually be cut off and followed by ellipses.
That’s what we see happening in the snippet preview here:

Now, let’s type in a meta description. We want to encourage searchers to click on our article, so we’ll try to provide them with a good reason to do so.

Our new meta description is within the recommended length. It’s concise and describes what our article offers.
What’s a Meta Description Tag?
A meta description tag is HTML code that tells Google (and other search engines) “This is the description the publisher would like displayed in search engine results.”
When you type in your meta description, AIOSEO saves it and applies this HTML code to it.
This is what a meta description looks like in HTML.
<meta name="description" content="Use our easy 3-step template to create a digital strategy that grows traffic, conversions, and revenue. [Bonus: Get it reviewed by our pros within 24 hrs.]" />What’s next? Let’s take a look at your slug.
Step 5: Optimize Your Slug
What’s a slug? (No, it’s not that thing eating your petunias. We’re pretty sure you wouldn’t want to optimize that.)
A “slug” is the last part of a page URL. It’s preceded by a forward slash (“/”) and provides a unique “address” for your web page.
In the example below, /welcome-to-my-website is the slug.
mysite.com/blog/welcome-to-my-new-website
Many content management systems, including WordPress, automatically generate a slug that matches your page title word-for-word.
So now that you know what a slug is, how do you optimize it for SEO?
Include Your Focus Keyword
Slugs are a minor ranking factor. Google’s John Mueller has called them a “very lightweight factor” that’s primarily used as a signal for classifying content when Google first encounters a page.
Since WordPress turns your post title into a slug, as long as you include your keyword in your title you should be fine.
Imagine our focus keyword is “fix drywall holes.” Here are some examples of slugs that include the keyword:
/fix-drywall-holes
/how-to-fix-drywall-holes
/how-to-fix-drywall-holes-easily
/best-way-to-fix-drywall-holes
How to Change Your Slug in WordPress
If for any reason you want to change your slug, you can do so easily.
In the WordPress editor, click the Settings gear icon at the upper right.
Then go to Post » Permalink. You’ll see a field where you can edit the slug.
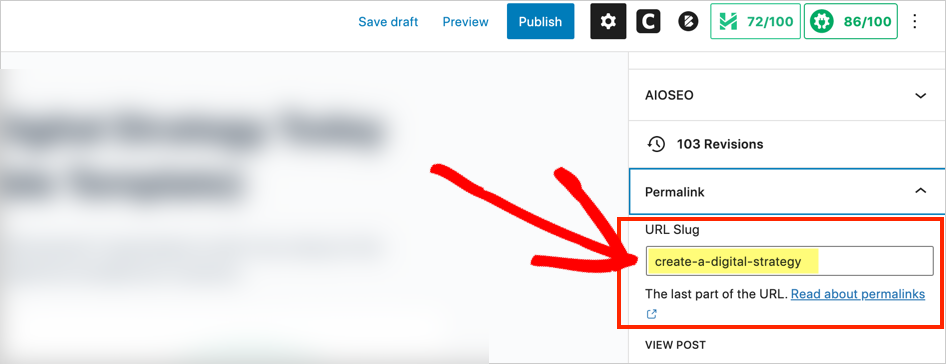
Great, now you know how to check and optimize your:
- Post title
- Meta description
- and slug.
Here’s a handy cheat sheet covering what you learned.
Cheatsheet: Search Snippet Guidelines
| SEO item | Approximate character limit before cut-off | Tips |
| Post or Page Title | 60 | Include your focus keyword. Title should inform and persuade. Make sure your title makes sense before the cut-off point. |
| Meta description | 160 | Include your focus keyword and one or more related keywords. Include what makes your article unique or valuable. |
| Slug | Not applicable | Include your focus keyword |
AIOSEO: Global Search Snippet Tool Settings
In AIOSEO, you can set your own default preferences for how all your search snippets display in the preview.
This is easy to do, so there’s no need to rely on a webmaster.
In the admin bar of your WordPress editor go to:
AIOSEO Settings » Search Appearance » Content types
Here you can set your preferences for each content type on your site.
For example, if you don’t want the Site Title (or a Separator) to display on any of your WordPress posts, then remove those gray tags.
You can also create different settings for your WordPress pages.
(By default, WordPress sites have 2 web page types: Page and Post. Post refers to articles, announcements, or blog posts. Pages are typically landing pages that form your main navigation points.)
Pro Tips and Extras
Here are a few additional tips and tricks to help you understand and craft a good SERP snippet.
Start with a focus keyword
Before you write an article you should choose a main topic. In SEO this is called a focus keyword. (New to keyword research? Check out this great beginner’s guide.)
- Include your focus keyword in the slug, the title, and the meta description.
- The AIOSEO plugin will give you other recommendations for using your focus keyphrase in your article.
Google May Pull a Different Meta Description
There’s no guarantee that Google (or other search engines) will display the meta description you wrote, but if it’s well-written, it’s likely it will appear.
A good rule of thumb is, if Google can’t “write” a better one, yours will be picked to display.
That said, remember that you’re writing your meta description to focus on your focus keyword (search term). When people use a related but different search term, Google may pull an excerpt from your page that better answers the searcher’s query.
Here’s a good example. In the screenshot below, the meta description we wrote appears word-for-word in a search display for a given query.
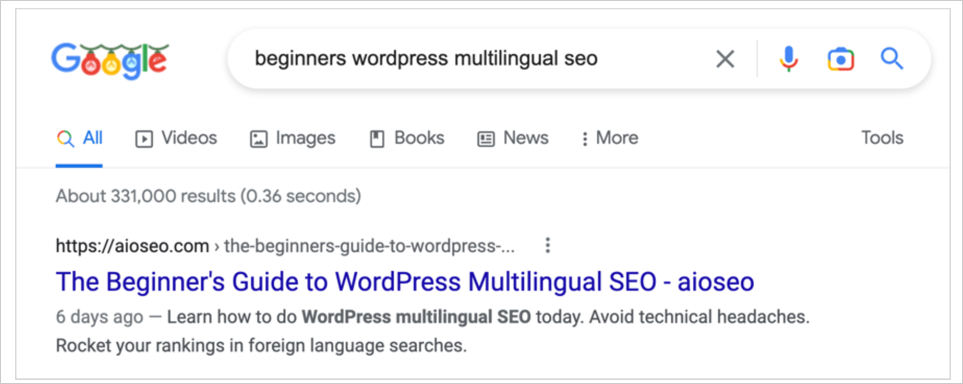
But if we type in a different search term, Google pulls a different description, one that better matches the searcher’s question:

Be Careful When Including “How to” in a Title
When you search for “how to” content (like “how to fix drywall holes”), the dominant search results are step-by-step tutorials. This is what searchers expect when they see “how to” in a headline.
The “Diwali Special” example we cited earlier included “How to” in the headline:
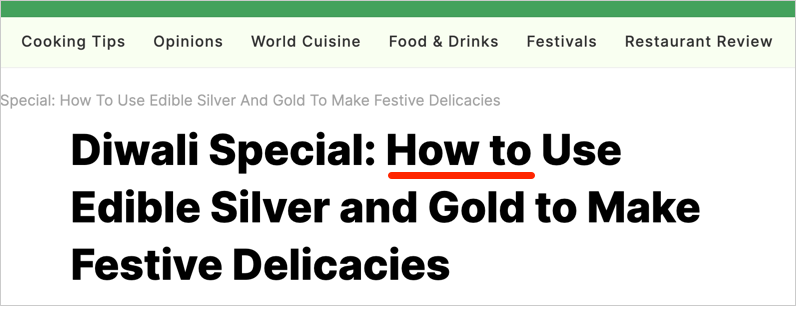
This interesting article doesn’t provide any recipes or step-by-step instructions, though.
In a case like this, it might be better to alter the headline or to add a recipe to the page.
How to Preview Rich Snippets
If you have added schema markup to a web page, then you can preview the related rich snippet by following these instructions.
Wondering what rich snippets (also called “rich results”) are? You can think of them as deluxe search engine displays.
Instead of the standard URL, title, and description, rich results include extras like star ratings, multiple images, prices, event dates, shipping information, or product stock status.

Rich results are made possible with something called schema markup code.
You can use AIOSEO to add schema markup to your pages with just a couple of button clicks. Find out how here.
Don’t Worry About Measuring Snippets by Pixels
Some Google SERP simulators caution that you should measure your snippet by pixels to determine if it would be cut off. We don’t believe that’s necessary. Here’s why.
While part of a page title may not fit in the SERP, Google’s algorithm prefers to not cut a word in two.
So, it will cut a too-long title off after a blank space, preserving the prior word whole, if possible.
We can see an example of this below, in the search engine result for a Danish article about the University of Copenhagen’s library.

- The word “videnskabeligt” is complete.
- Google cut off the final word (oplevelsesrum).
We can see the missing word on the web page itself:

Why pixels don’t matter: Where a title may be cut off depends on the length of words, number of words, and placement of spaces. (In this case, the title was cut off after 63 characters.)
Is a Google SERP Simulator the same thing as a SERP Snippet Preview?
Yes, these two things are fundamentally the same. Other terms used include SERP snippet generator and Google snippet preview. While search engines like Bing provide methods for previewing SERPs, all of the popular SERP snippet tools provide previews styled after Google’s search engine results pages.
Bonus Tips
Here are two easy action steps you can take to improve your website.
Feeling adventurous? Add some FAQs to your site to boost SEO.
And don’t forget to plan for capturing leads.
Keep Moving Forward
We hope this article has helped you learn an easy way to use a SERP snippet preview tool. We recommend exploring proven ways to get more traffic. Plus, learn how to avoid SEO scams.
If you found this article helpful, then please subscribe to our YouTube Channel. You’ll find many more helpful tutorials there. You can also follow us on Twitter, LinkedIn, or Facebook to stay in the loop.
Disclosure: Our content is reader-supported. This means if you click on some of our links, then we may earn a commission. We only recommend products that we believe will add value to our readers.
