Would you like to know how to add emojis to your WordPress blog?
Emoji are a great way to make your content stand out on SERPs. They’re also an excellent way to drive up engagement rates.
In this article, we’ll show you how to add emojis to your WordPress blog. And that’s without any coding or technical knowledge.
In This Article
What are Emojis?
Emojis are digital icons you can use to represent emotions, objects, or ideas.
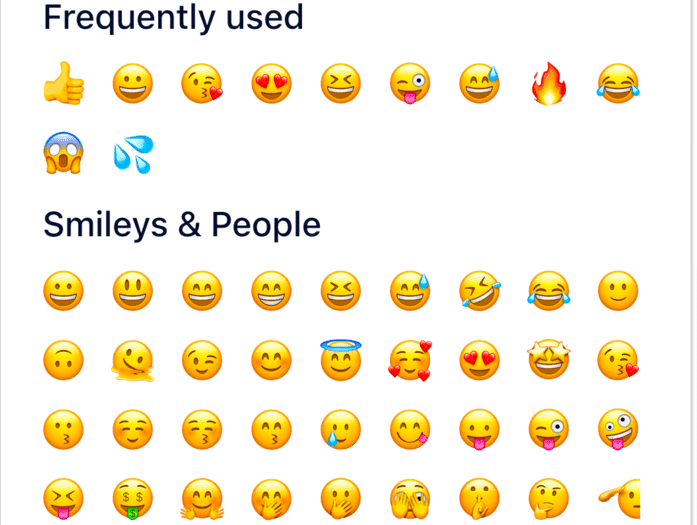
Emojis were developed as textual representations of facial expressions in online communications way back in the late 90s. They were gradually adapted for different platforms on the web and mobile devices, resulting in them becoming ingrained in almost all types of digital communication.
And starting in version 4.2, emojis are now supported directly in WordPress. Not only that, but search engines also support the use of emojis in search snippets.
Now, let’s look at how to add emojis in WordPress.
How to Add Emojis to Your SEO Titles and Meta Descriptions in WordPress
One of the most important places to add emojis to your WordPress blog is in your metadata. Putting them in your SEO title tag and meta description helps you have search snippets that are more prominent and have higher organic CTRS.
So, how do you add emojis to your SEO titles and meta descriptions?
Step 1: Install and Activate All In One SEO (AIOSEO)
The first step to adding emojis to your metadata in WordPress is to install and activate All In One SEO (AIOSEO).

AIOSEO is a powerful WordPress SEO plugin boasting over 100 million downloads. It’s trusted by millions of savvy website owners to help boost their search rankings and drive more traffic to their sites. This is because AIOSEO has many features and modules designed to help you optimize your website for search engines and users.
One of the most loved features is the emoji picker, a very handy tool that makes it easy to add emojis to your metadata.
For step-by-step instructions on how to install AIOSEO, check out our installation guide.
Step 2: Edit Your Metadata
The next step to adding emojis to your SEO title (also called Post Title) and meta description is to edit your metadata. To do this, simply scroll down to the bottom of the page you’re editing till you reach the AIOSEO Settings section. You can edit the Post Title and Meta Description fields in this section.
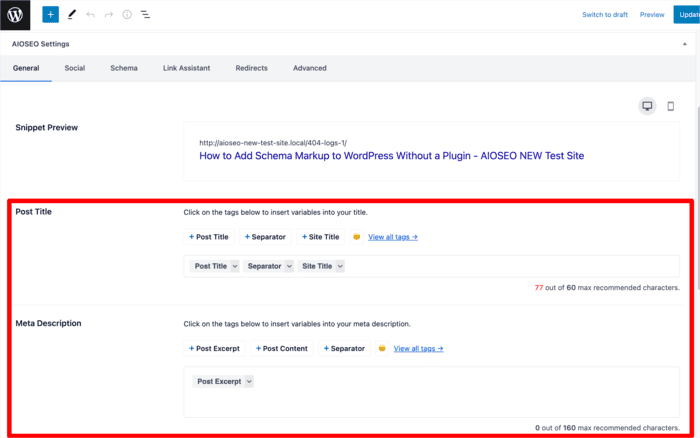
Fill in the relevant information, ensuring your Post Title and Meta Description are SEO-friendly.
Step 3: Pick Your Emoji
Once you’ve filled in the relevant information, you can now add your emoji of choice.
To do that, click on the emoji icon next to the tags above each field.
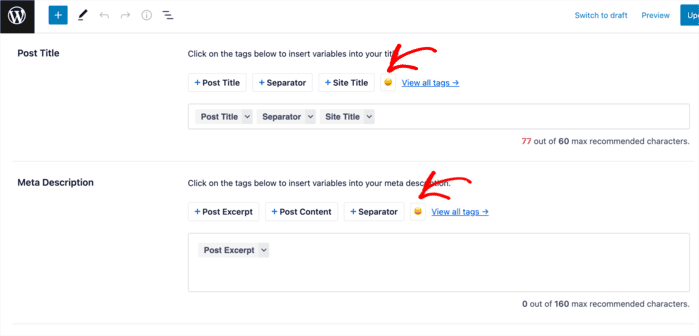
Clicking on the emoji icon will open up a selection of emojis for you to choose from. Simply click your emoji of choice to add it.
And that’s it! You’ve added emojis to your SEO Titles and Meta Descriptions in WordPress.
How to Add Emojis to Your WordPress Blog Content
Adding emojis to your WordPress blog content is super easy. All it takes are a few keyboard shortcuts.
Adding Emojis in WordPress Using Windows
If you’re a Windows user, open the post or page where you want to insert emojis. While in the WordPress content editor, click on the text area you want to add the emoji. Next, press the Windows + . (Period) shortcut keys on your keyboard.
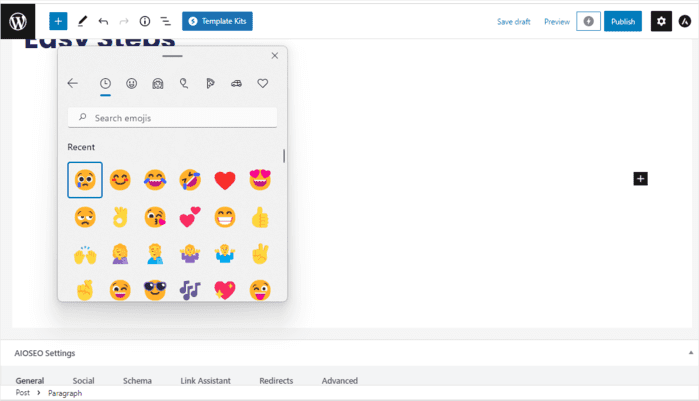
This will open a modal (window) showing a selection of emojis to choose from. Search through the emojis to find the want you want to add.
Next, click on your emoji of choice to insert it into the text area.
Adding Emojis in WordPress on a Mac
Adding emojis in WordPress on a Mac is super easy. Again, start by opening your post in editor mode and navigating to where you want to add your emoji.
Next, press the Command + Control + Space keys together.
This will bring up a popup where you can browse and look for emojis.
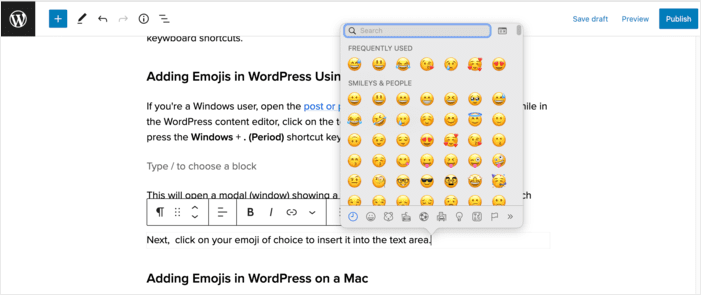
Once you find the emoji you want to use, click on it to insert it into your text.
Adding Emoji in WordPress from Third-party Sources
Besides using keyboard shortcuts, you can also add emojis in WordPress by copying and pasting from third-party sources. One of the most popular is Emojipedia.
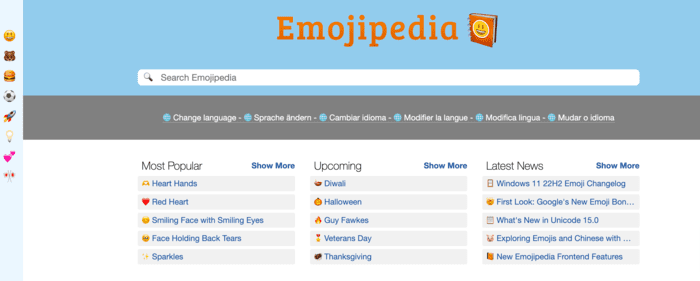
To add an emoji from Emojipedia, search for your emoji of choice using the categories or by running a search. Next, click on the emoji you want to use. This will open up a dedicated page for that emoji, with the option to copy the emoji.
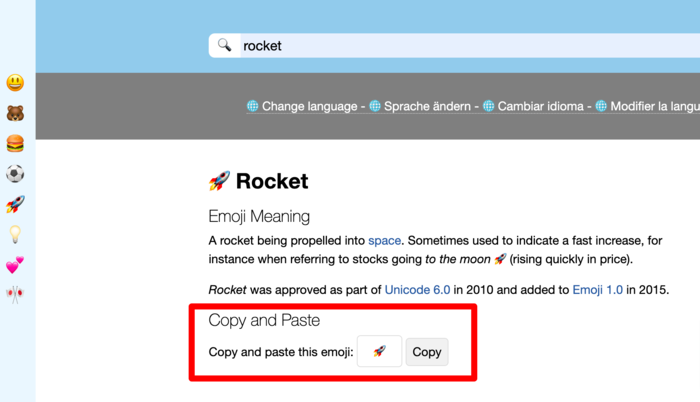
Click on the Copy button and paste the emoji where you want to paste it into your blog post.
And that’s it!
You’ve added an emoji to your WordPress blog. It really is that easy.
We hope this article has helped you know how to add emojis to your WordPress blog. Once you’re done, you may also want to check out some of the other tutorials on our blog. Fantastic examples include our guide on how to implement structured data in WordPress. Or you may be interested in our guide on how to add an FAQ section in WordPress.
🚀
Disclosure: Our content is reader-supported. This means if you click on some of our links, then we may earn a commission. We only recommend products that we believe will add value to our readers.
