Would you like to learn how to use the Google snippet preview to boost your SEO?
The preview is a picture of your page in Google search results. By using a preview, you can find and fix errors before publishing.
In this step-by-step tutorial, we’ll share an easy way to use a Google snippet preview to optimize your SEO. And we’ll provide some snippet tips that’ll put you ahead of the game.
In This Article
Why Use a Google Snippet Preview?
We all know how standard search engine results look. There’s a title, a link, and a description. In SEO, we call that a “search snippet.” It looks like this:

But sometimes, the title gets cut off, as in this example below.

Or the snippet may not provide a clear description of the article.
Problems like this can cause people to skip your article. And that makes it hard to get new readers or sales.
Previews provide a simple way to improve your snippet so that it drives more click-throughs.
And one of the easiest ways to access and edit previews is to use an SEO plugin.
Step 1: Download the All in One SEO (AIOSEO) Plugin
We recommend you download and install the All in One SEO (AIOSEO) plugin.
This is an established plugin that’s beginner-friendly.
All in One SEO (AIOSEO) has thousands of 5-star ratings on WordPress.org, and over 3 million people are currently using it.

After downloading AIOSEO in your WordPress editor:
- Go to Plugins » Add New
- Upload the zip file
- Click Activate
A setup wizard will open and walk you through a few easy steps.
Questions? Check out our installation guide.
Step 2: Find the Google Snippet Preview
Now, in your WordPress editor, navigate to a page or post that you want to see a Google snippet preview of.
Option 1: Start From WordPress Preview Mode
If you’re in WordPress preview mode, hover your mouse over the AIOSEO icon in the admin bar.
In the drop-down that appears, select SEO Preview.

Now you can see your Google SERP snippet preview:
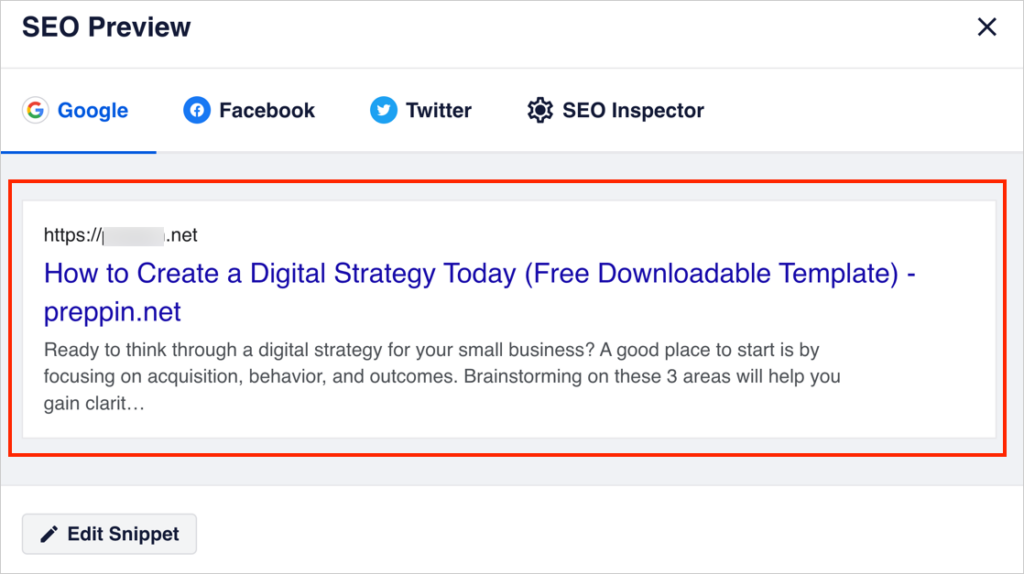
If you want to change your title or description, click the gray Edit Snippet button. Then follow the instructions in Steps 2 and 3.
Option 2: Start From Editing Mode
If you’re in WordPress editing mode, do the following.
- In the upper right corner, click on the AIOSEO button. (That will open AIOSEO settings in your right-hand navigation column.)
- Then click General.
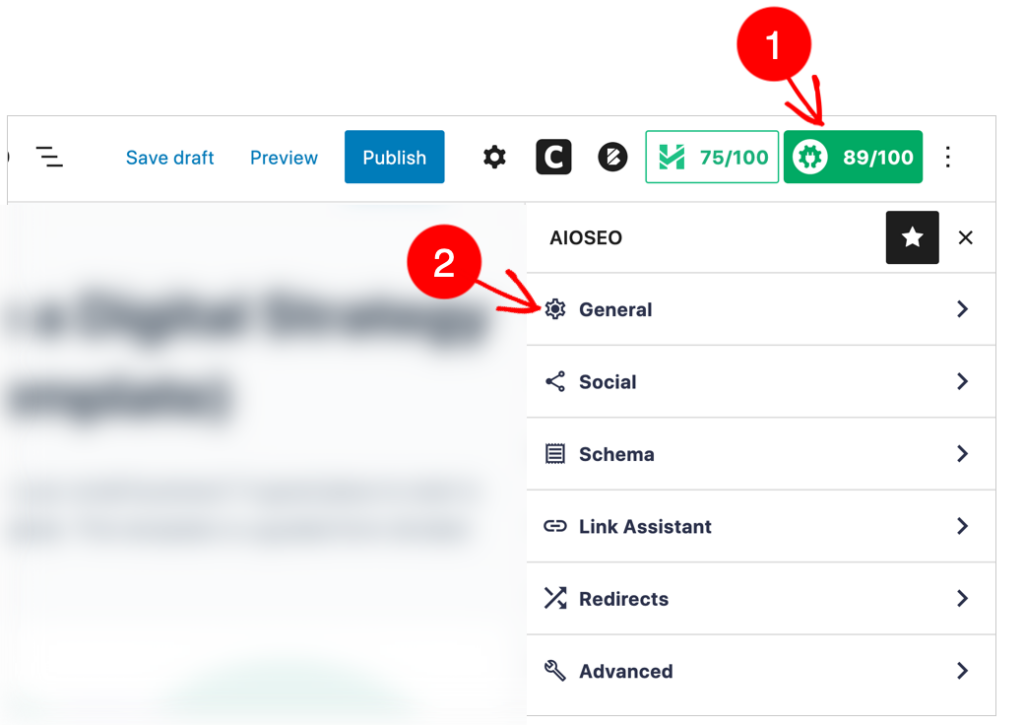
Now you’ll see your Google snippet preview.
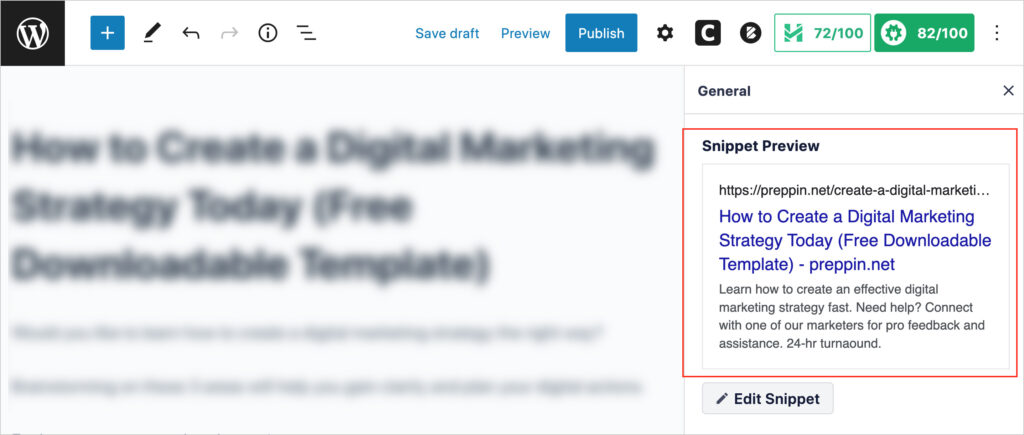
This snippet preview is narrow and simulates what your article would look like on a smartphone.
How to Toggle Between the Desktop and Mobile Preview
Beneath the snippet preview, click the edit button to see a desktop preview.
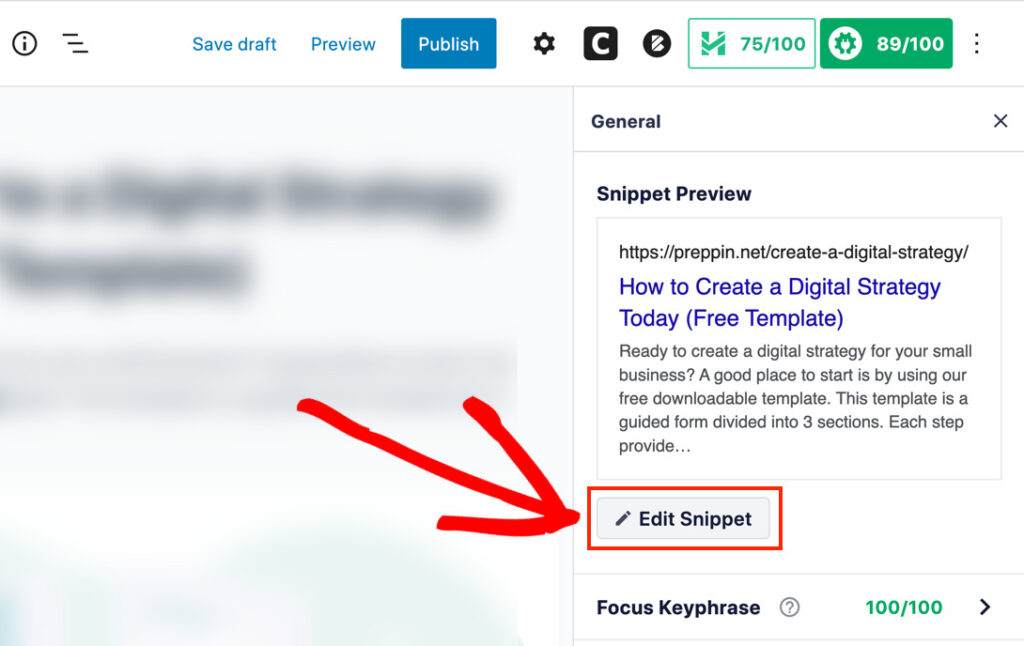
A small pop-up window will appear. Notice that your snippet preview is wider. The preview is now simulating what your page would look like for someone doing a desktop Google search.
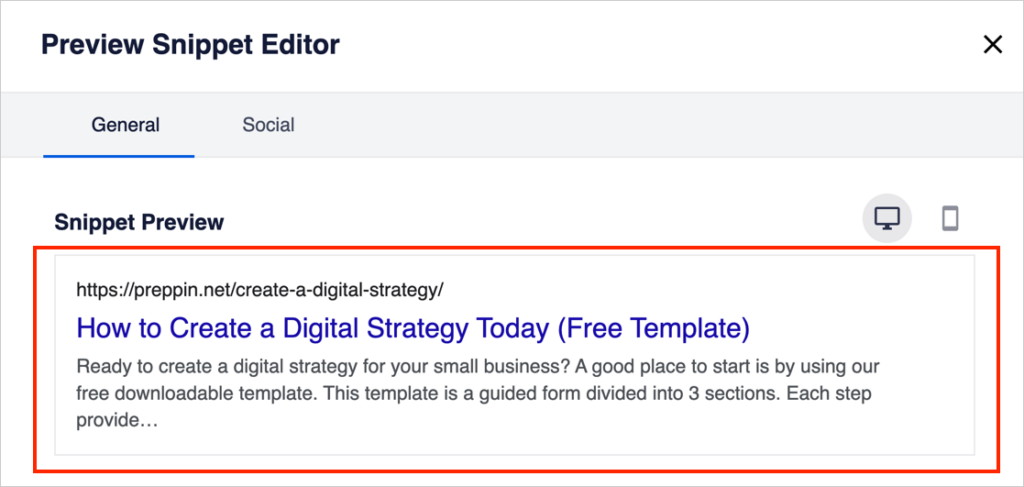
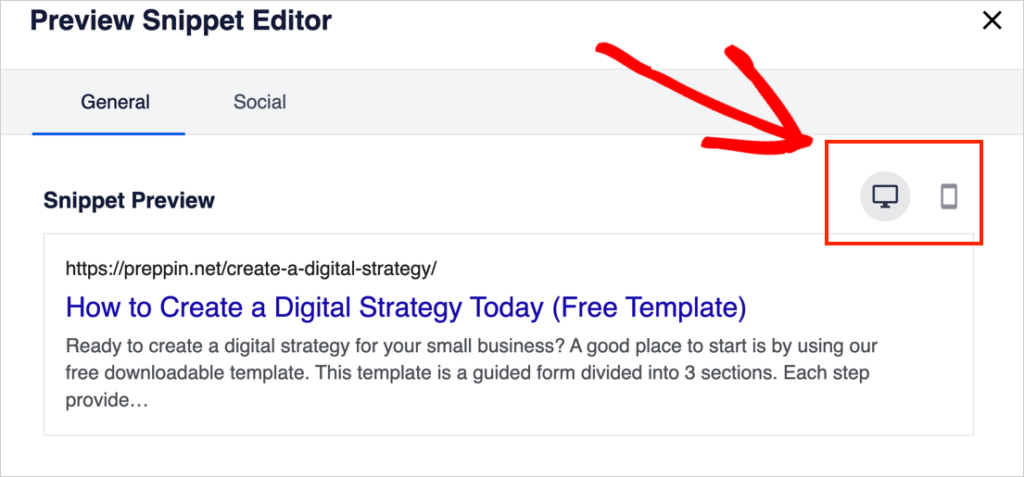
You can toggle between desktop and mobile snippet previews by clicking the device icons in the upper right area of the pop-up window.
Now that you know where to find the Google snippet preview let’s explore the Post Title field.
Step 3: Optimize Your Title
Below the Google snippet preview, you’ll see a Post Title section.
Here’s how it looks.

You’ll see 3 small gray boxes (or “tags”) in the Post Title field.

Here’s what those gray tags do.
- The Post Title tag automatically pulls in the title you typed at the top of your article.
- The Separator tag automatically adds a customizable separator character (like a dash or a pipe) after your title.
- The Site Title tag automatically pulls in the name of your website.
These tags can save time because you don’t need to type any content in.
By default in AIOSEO, this is how all your Post Title fields are set up.
But you can remove the Site Title and Separator and use all 60 characters just for your article title.
Now, let’s look at two cases where you might want to change the default settings of the Post Title.
Case #1: You Want to Shorten Your Title
In our example preview below, our title is over the recommended 60 characters.
Note that the Separator and Site Title (plus the spaces in between) are part of that 60-character count.
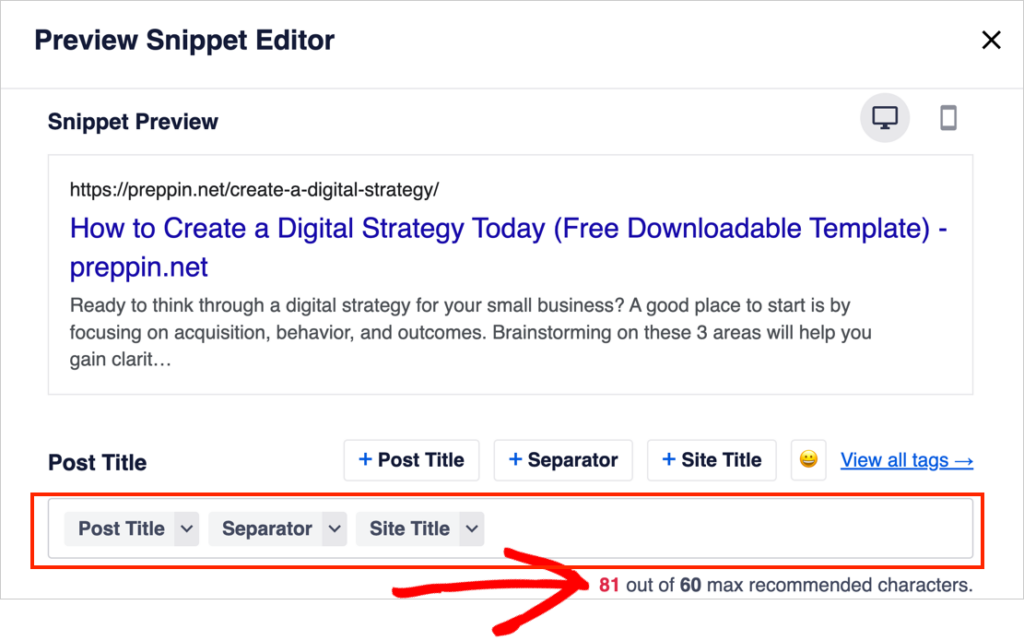
So, what to do?
You could remove the Separator and Site Title tags.
(You can always add them by clicking the “spares” at the upper right.)
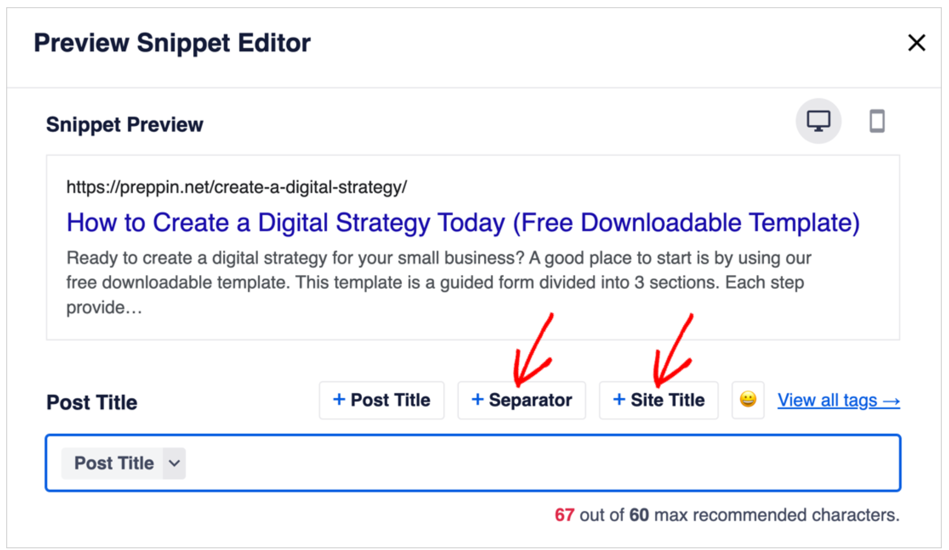
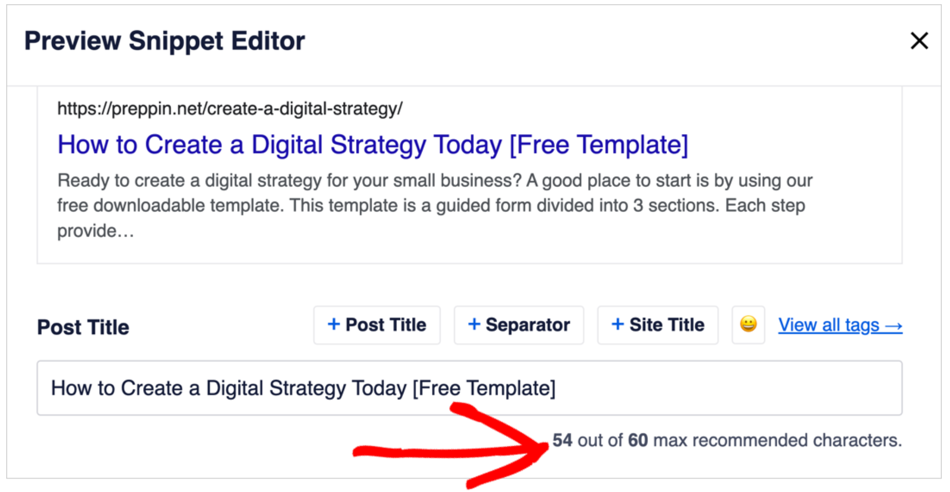
Notice in the example above that our title is still over the recommended 60 characters.
By removing the word “Downloadable,” our title now fits within the recommendations.
Note: to change your title, either edit the title directly on the article page, or, delete the gray Post Title tag from the field, and type in your preferred title.
We did the latter in this case below:
Case #2: We want to use all available space for our title
Now let’s imagine that our title, separator, and site title combined are within the recommended 60-character limit. Here’s a made-up example:
How to Replace a Toilet (5 steps) – Monongahela Hardware
But the site name takes up a lot of space.
We might want to get rid of the separator and site title just so we can add more words to our title, like so:
How to Replace a Toilet (5 steps) – [DIY or Hire us]
The headline above gives the searcher more information: It’s not just a DIY article. You can hire this hardware store to do this job for you.
If the site owner has set up local SEO, then this article will show up for local searches for “how to replace a toilet.”
Now you understand the default settings for the Post Title field. And you know you can change these or manually type in a title.
Let’s take a look at exactly how your title affects SEO.
Title SEO Factors
Titles can have a significant impact on click-through rates. Here are 3 ways to prep your title for SEO.
Include a Focus Keyword
It’s important to include your focus keyword in your SEO title.
Your focus keyword helps Google understand what search queries your article should appear in.
You can think of the focus keyword as the main topic of your article. (New to keyword research? Check out this great beginner’s guide.)
Here are some examples of focus keywords included in titles.
- 8 Best WordPress FAQ Block Plugins
- Go Paperless in 7 Steps
- 9 Best Clickfunnels Replacements Free and Paid
- OptinMonster Review 2023: Is it the Best Tool for Growth?
Persuasive Text
Your title should be clear and descriptive. Along with the page description (discussed below), your title is one of your biggest opportunities to get click-throughs. It should give searchers an excellent reason to click.
But don’t over-promise. Write a title that tells the searcher what they can expect from your web page.
Title Length: Is the Number of Characters Important?
We mentioned that the AIOSEO snippet preview tool recommends capping titles at 60 characters.
But here’s some nuance. There are cases where you may want to use titles that are longer. Marketers often do.
Let’s see why. In the example below, this article has a 66-character-long title. The article is displayed as a “featured snippet.” Because of the large display area, the full title is shown (at the top).
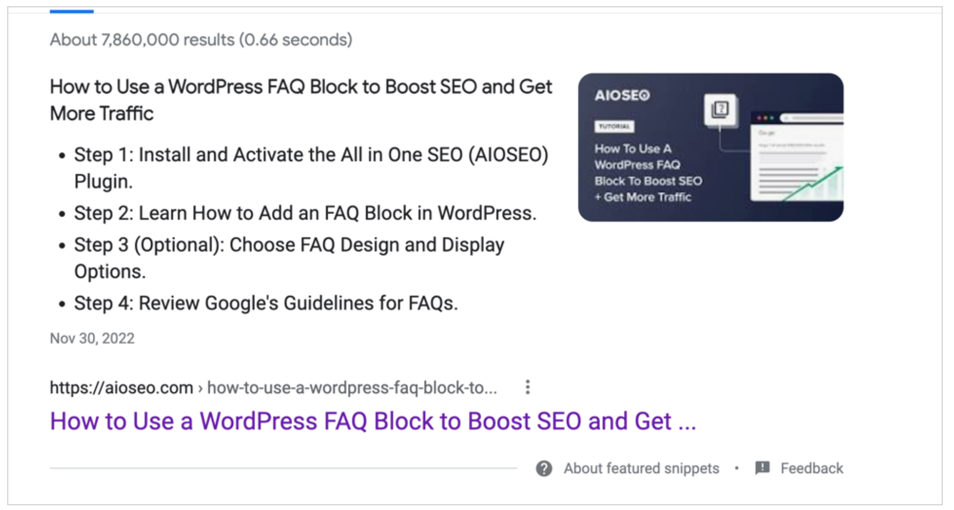
But only some articles wind up as featured snippets. The key benefit of using a long title is you can include additional keywords for search engines.
If you try this, make sure that what appears in the first 60 or so characters is a complete title.
Now, let’s move on to your description.
Step 4: Optimize Your Description
Returning to the Google snippet preview, scroll past the Post Title, and you’ll see a Meta Description area.
Here we recommend that you remove the Excerpt tag. It’s just a placeholder that tells Google to pull any excerpt from your page.
Because you get 160 characters for your description, you’ll want to craft it yourself.
- Be sure to include your focus keyword.
- Try to include a few related keywords.
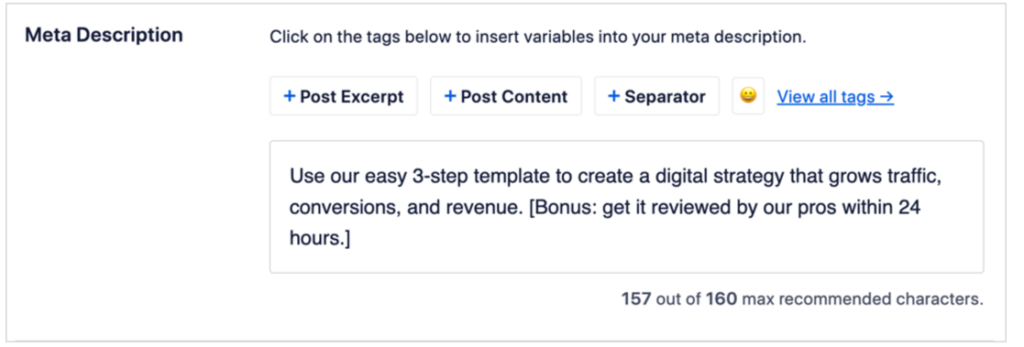
In the example below, “create a digital strategy” is our focus keyword (or main article topic). We’ve added the words “traffic, conversions, and revenue” because these are 3 things people hope to achieve with a digital strategy.
Then we added some “bonus” information at the end.
Meta Description SEO Factors
Now let’s review the main SEO factors for your meta description. It’s important to realize that meta descriptions are not ranking factors, but they can boost your SEO.
Focus Keyword Presence
Your focus keyword should be in your meta description. And you can include related keywords.
You can find related keywords by doing a Chrome Incognito search using your focus keyword or by using a free tool like Ubersuggest.
Informative and Persuasive Text
Ask yourself: “What’s unique or valuable about my article? How is it different from others on the same subject?
Like your title, this is a significant opportunity to win click-throughs with a precise summary.
Emojis
You can put emojis in your meta description or title. Emojis aren’t a ranking factor, but they are eye-catching. For that reason, they may increase click-throughs.
You’ll need to experiment to see if this is the case with your content. But make sure emojis are a good fit with your brand voice first.

Step 5: Optimize Your Slug
A slug is the last part of a URL. A forward slash precedes it:
example.com/blog/hello-world
In the example above, “hello-world” is the slug.
By default, WordPress automatically generates a slug for each post you create. It simply copies the title of your post. So a post called “This is My First Blog Post” would generate this slug:
example.com/blog/this-is-my-first-blog-post
Include Your Focus Keyword
We recommend that you include your focus keyword in your slug.
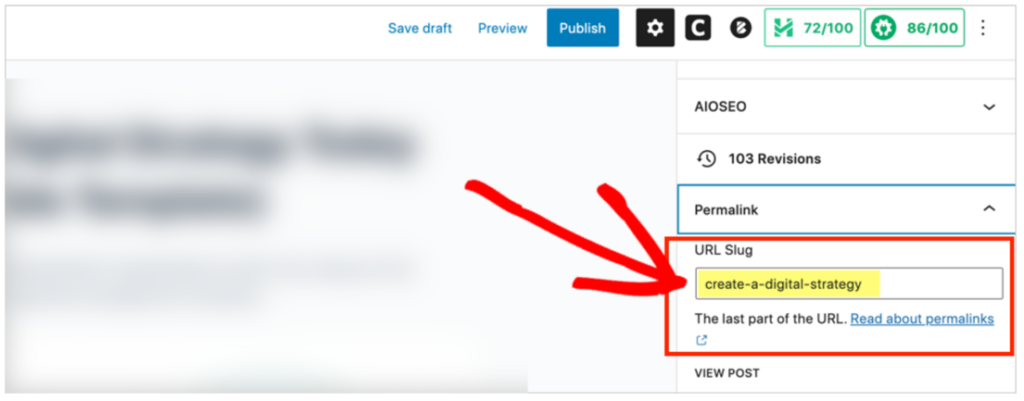
You’ll be fine if you include your keyword in the title. But if you want to edit your slug, you can click the gear icon at the upper right. Then go to Post » Permalink.
You’ll see a URL slug field. Just type your preferred slug there.
A Few Extra Notes
- SEO tools: Now that you’re using the All in One SEO (AIOSEO) plugin, explore some easy SEO wins like adding breadcrumbs or a table of contents to your pages. That can improve user experience too.
- Pixels: Some websites say you need to measure your titles by pixels. This isn’t true. It’s a rumor that spread after a Google employee made a related joke.
- What’s Google SERP? SERP (or SERPs) stands for search engine results pages. Put “Google” in front of that and the phrase refers specifically to Google’s search engine results pages.
- What’s a SERP simulator? This is the same thing as a Google snippet preview. There are lots of names for this including SERP snippet preview tool or Google SERP snippet optimization tool.
What’s Next?
Small tweaks to your title and description can have an outsized impact.
We hope this post helped you understand the benefit of using the AIOSEO plugin to optimize Google snippet previews in WordPress.
And check out our article on how to avoid SEO scams and how to use FAQs strategically to drive more traffic.
If you found this article helpful, then please subscribe to our YouTube Channel. You’ll find many more helpful tutorials there. You can also follow us on Twitter, LinkedIn, or Facebook to stay in the loop.
Disclosure: Our content is reader-supported. This means if you click on some of our links, then we may earn a commission. We only recommend products that we believe will add value to our readers.

Im using AIOSEO and was considering buying the pro version until ive noticed that Google is completely IGNORING my description and pulling text from a random part of the site, so what is the point? Ill try Yoast instead
Hey Kevin, Google sometimes automatically rewrites meta descriptions based on what it deems most relevant to the user’s search, regardless of the SEO plugin you use. This means that whether you’re using AIOSEO, or any other SEO plugin, all meta descriptions are suggestions to Google, but the final decision rests with the search engine. You can read more about this here: https://www.searchenginejournal.com/why-google-rewrites-meta-descriptions/370452/
If you have any other questions, please let us know!
Thank you for your feedback.