Would you like to know how to add Local Business schema in WordPress?
If you run a service-based or brick-and-mortar business, adding Local Business schema will help you rank for local searches and drive foot traffic to your business.
In this article, we’ll show you how to add Local Business schema to your WordPress site, even if you don’t have any coding knowledge.
In This Article
What is Local Business Schema Markup?
Schema markup, or structured data, is a semantic language that helps search engines better understand your content. It involves using tags that give search engines more context about your pages or posts.
Local Business schema, therefore, refers to the schema type you add to your website to help search engines better identify your business, the products or services you provide, and your location.
Note: Local Business schema markup is ONLY output in the homepage source code, as per Schema.org requirements.
Why Local Business Schema is Important
The biggest advantage of adding Local Business schema to your site is it helps boost your local SEO. As a result, you get to rank for relevant local searches related to your business. Another reason is that it helps search engines generate rich snippets for your search listings.
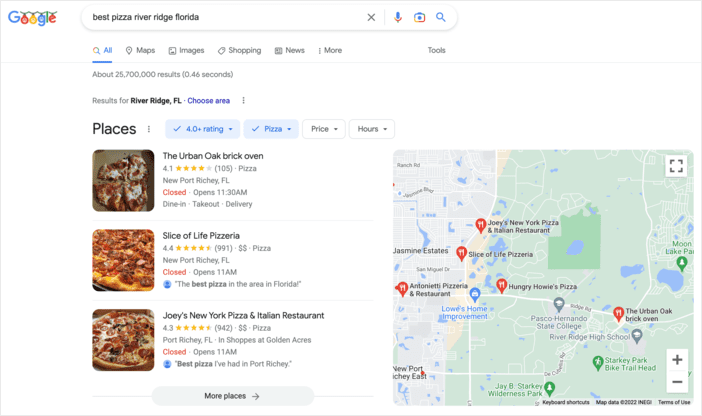
Rich snippets are search listings that offer searchers more information, resulting in higher organic clickthrough rates (CTRs).
Check out this step-by-step guide for other tips on generating rich snippets.
How to Add Local Business Schema in WordPress
Ready to add Local Business schema to your site and boost your local SEO?
Let’s get started.
Step 1. Install All In One SEO (AIOSEO)
The first step to adding Local Business schema to WordPress is installing a powerful SEO plugin like All In One SEO AIOSEO.
AIOSEO is the best WordPress SEO plugin on the market. Over 3 million savvy website owners and marketers trust the plugin to help them dominate search engine results pages (SERPs) and drive relevant traffic to their sites. This is because the plugin has many powerful SEO features and modules to help you optimize your website for search engines and users.
One of the features many local businesses rave about is the Local SEO module.
This powerful module is designed to help you rank your website and content for local searches, resulting in more business for your brand.
For step-by-step instructions on how to install AIOSEO, check out our installation guide.
Step 2: Add Location Schema (Single Location Business)
Once you’ve installed AIOSEO, the next step to adding Local Business schema is to add your business and location information. To do that, go to the AIOSEO menu » Local SEO. This will open a page where you can input your location and business information.

One of the first things you’ll have to add is to indicate whether your business is a single or multiple-location business.
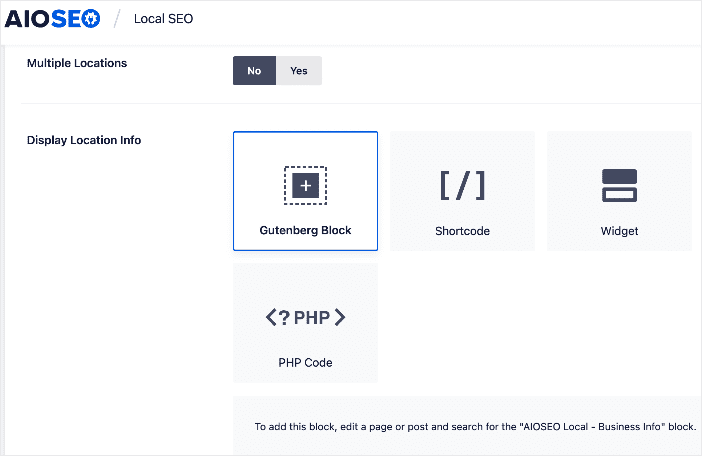
If yours is a single-location business, leave the Multiple Locations toggle set to No.
You can also choose whether you want your location information to be displayed as a:
- Gutenberg Block
- Shortcode
- Widget
- PHP code
Next, add other business information like name, logo (image), business type, and address.
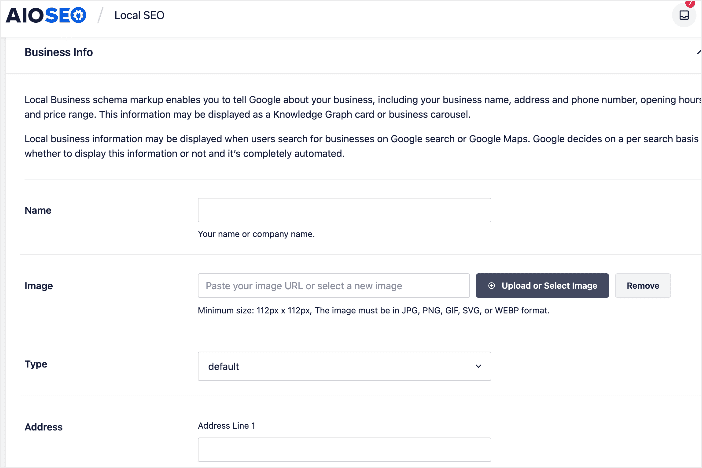
You can also add other information like a map of your location (more on this in a moment), contact information, VAT and Tax IDs, payment information, and the areas you serve.
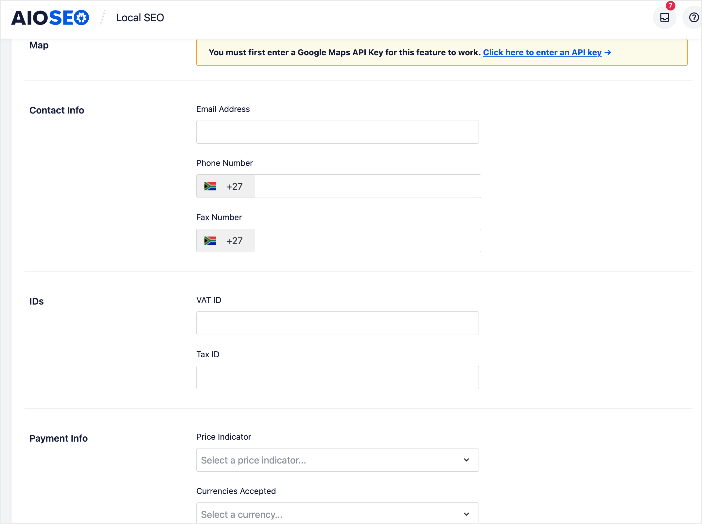
Once you’ve filled in these fields, click the Save Changes button.
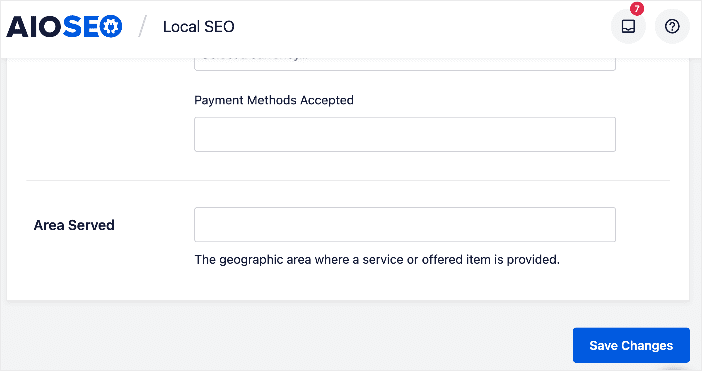
AIOSEO will save this information to your Local Business schema.
Step 3: Add Location Schema (Multiple Location Business)
If you run a multi-location business, you can add all your locations to your Local Business schema. To do so, you must set the Multiple Locations toggle to Yes.
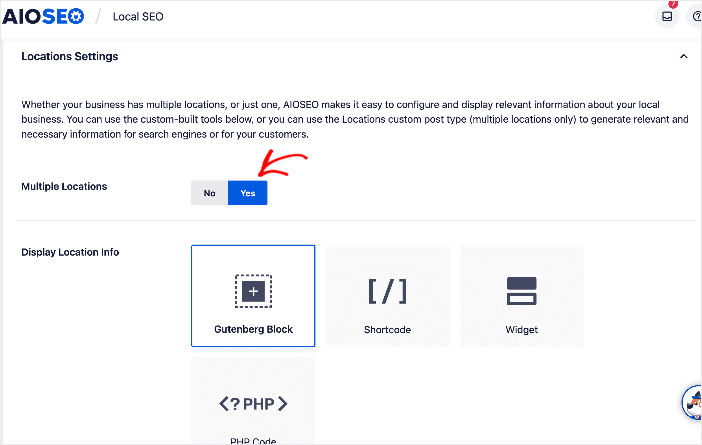
Again, you can choose whether you want your location information to be displayed as a:
- Gutenberg Block
- Shortcode
- Widget
- PHP code
After clicking Yes on the Multiple Locations toggle, click on Save Changes, and AIOSEO will create a new post type called Locations which you’ll see in the WordPress menu.
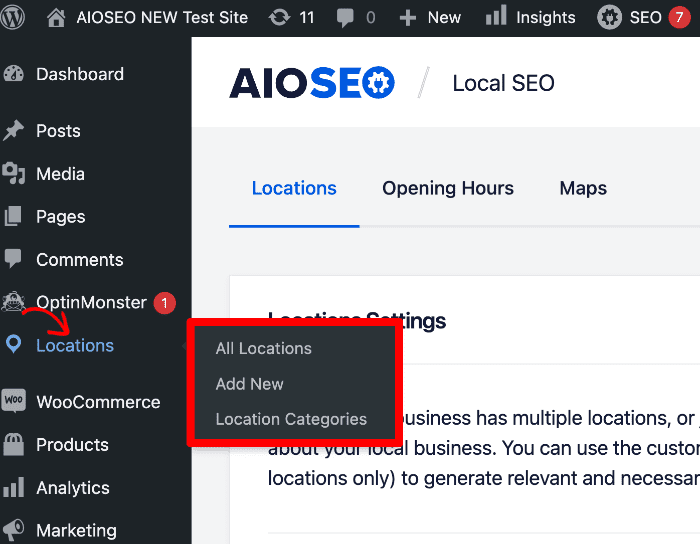
This is where you’ll add your different locations by clicking on the Add New option.
Doing so will open a page in editor mode, allowing you to add another location.
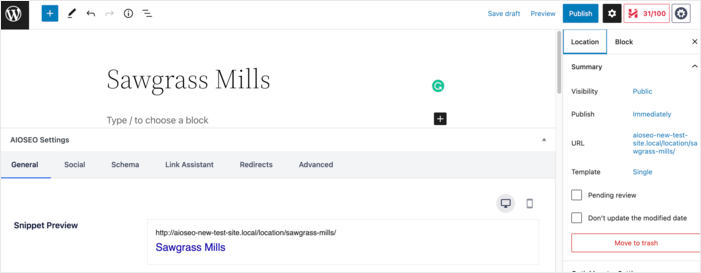
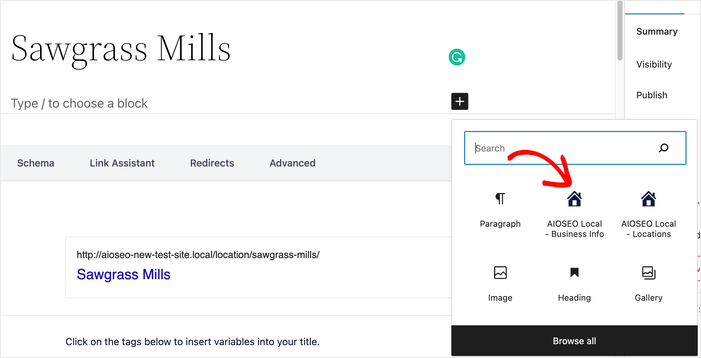
You can then add an AIOSEO – Local Business Info block to pull your location data.
After adding your additional locations, you’ll also have to configure your advanced location settings, which are broken down into 4 sections:
1. Locations Permalink
This is where you can view the permalink format that AIOSEO will use for your locations.
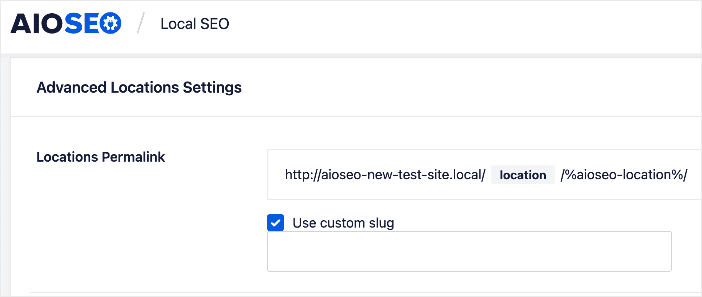
If you want to customize the Locations Permalink, check the Use custom slug check box. A field will be displayed where you can enter your custom slug to replace the word location in the locations permalink.
2. Locations Category Permalink
The Locations Category Permalink field shows the permalink format All in One SEO will use for your location categories.
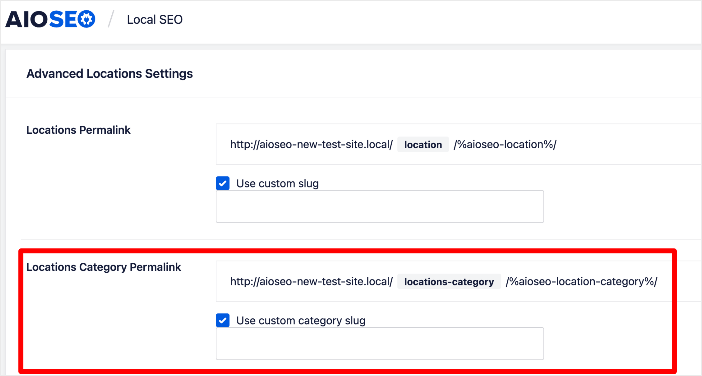
You can customize the Locations Category Permalink by checking the Use custom category slug check box. A field will be displayed where you can enter your own slug to replace the locations-category slug.
3. Enhanced Search
Next, you’ll see the Enhanced Search setting. Setting it to Off means your locations won’t appear in search results on your site.
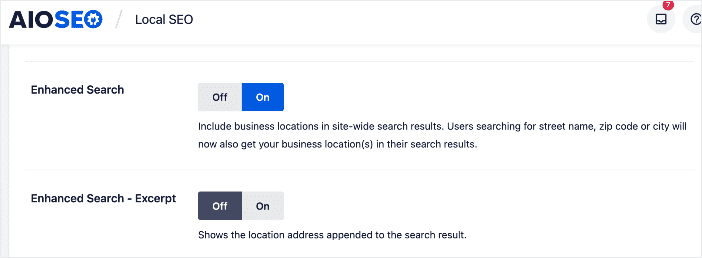
However, setting the toggle to On results in your locations being included in search results on your site. Switching the Enhanced Search toggle to On also displays an additional setting, the Enhanced Search – Excerpt. You can turn the toggle to On if you want location addresses to appear in search results on your site.
4. Custom Admin Labels
Custom Admin Labels enable you to control what the menu item for Locations is called.
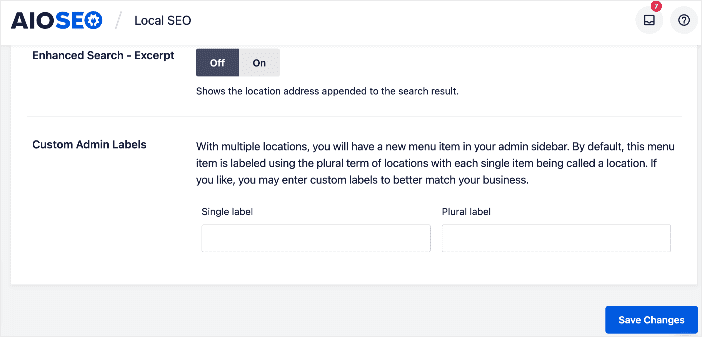
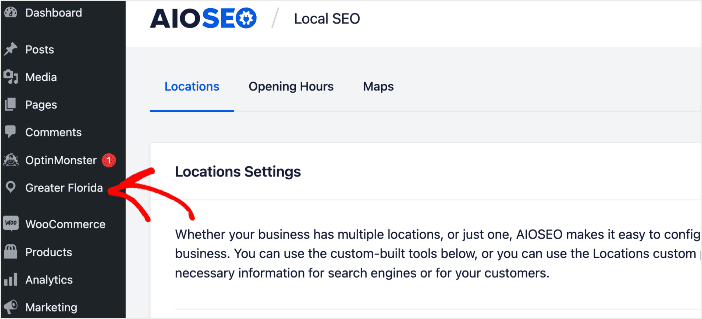
If you want to call Locations something different in the WordPress Admin area, then enter the new single and plural labels here. For example, if we choose “Greater Florida” as our custom label and click Save Changes, that’s what we’ll have in the WordPress admin area instead of Locations.
Step 4: Add Opening Hours
The next step to adding Local Business schema is to add your business hours. To do that, go to the AIOSEO menu » Local SEO » Opening Hours. This will open a window where you can add your opening hours.
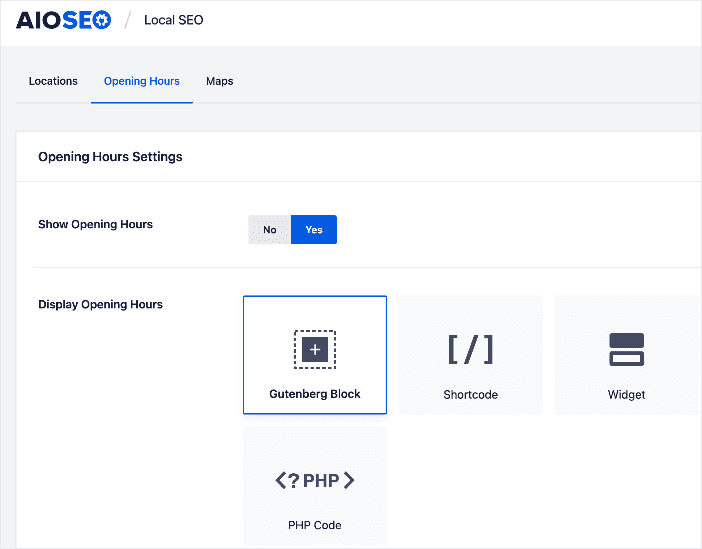
Set the Show Opening Hours toggle to Yes, and you’ll be presented with options for displaying your opening hours. Again, you can use a Gutenberg block, short code, widget, or PHP code.
Note: Opening Hours Schema markup is ONLY output in the homepage source code, as per Schema.org requirements.
Next, you’ll see the Labels section. This is where you can set the text to be displayed when you’ve set opening hours for any day to either Open 24h or Closed.
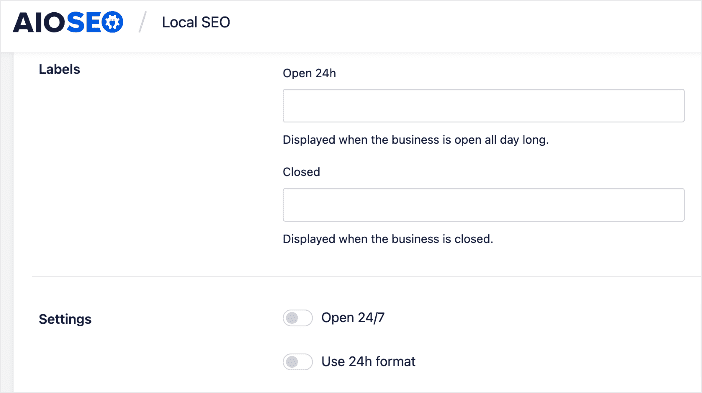
If your business is open 24 hours, you can set the toggle to Open 24/7, and that’s it. You’ve added business hours to your Local Business schema.
However, if your business has set operating hours, the next step is to choose whether to change the time format to 24H format. To do that, set the Use 24H format toggle to on.
Next, set your operating hours by clicking on the days and hours you’re open and those you’re closed.
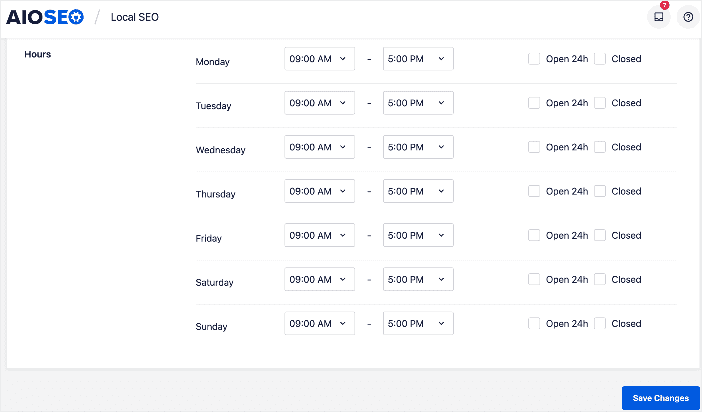
Once you’re done, click Save Changes, and your operating hours will be set.
Step 5: Add Google Maps
The final step to setting your Local Business schema is adding Google Maps, so you can visually display your location. To do that, go to the AIOSEO menu » Local SEO » Maps.
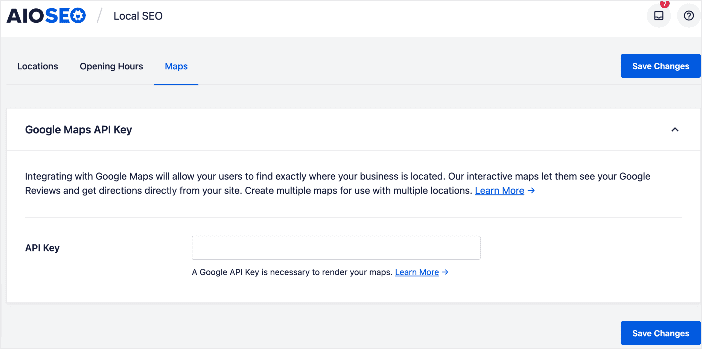
You’ll have to add a Google Maps API key in the API Key field for search engines to render your map.
For step-by-step instructions on adding a Google maps API key, check out this guide.
Once done, click Save Changes.
And that’s it!
You’ve now added Local Business schema to your WordPress site, complete with a visual map of your location.
We hope this post helped you learn how to add Local Business schema in WordPress. You may also want to check out other articles on our blog, like how to set up SEO for different languages and how to easily find and fix orphan pages in WordPress.
If you found this article helpful, then please subscribe to our YouTube Channel. You’ll find many more helpful tutorials there. You can also follow us on Twitter, LinkedIn, or Facebook to stay in the loop.
Local SEO Resources and How-Tos
- How to Use a Google Business Profile to Boost Local SEO
- What is NAP in SEO? (Plus: Business Directory Listings Tips)
- How to Get Local SEO Citations and Business Directory Listings
- What are Google Local Services Ads for Small Business?
- What is the Google Guaranteed Badge for Local Businesses?
- Local Business SEO for a Single Location
- Local Business SEO for Multiple Locations
- Setting up Google Maps for Local SEO
Disclosure: Our content is reader-supported. This means if you click on some of our links, then we may earn a commission. We only recommend products that we believe will add value to our readers.

Will this help SEO for my site even though it is an online-only business?
Hey, William!
Great question. The Local Business schema module is specifically designed for brick-and-mortar businesses and service-based businesses that serve specific geographic locations. It helps them rank for local search terms. However, the bulk of features and modules in AIOSEO will definitely help SEO for your online business. Check our blog for tutorials on many aspects of SEO that AIOSEO can help you with.
Thanks again.
Do you have a link to a demo of what the output is on the location page? Or is it just generated for the search engine and not necessarily meant to be viewed by visitors?
Hey Shane! The Local Business Schema markup is code meant for search engines and can’t be viewed by visitors. However, the Google Maps with your location can be viewed by visitors.
hi suppose, you have a brick-and-mortar business AND an online business, what are the options. More concretely: I’m giving music lessons in my home studio AND online. Would you recommend to make 2 separate sites or what are the options?